Edit: thread title changed to project “Argoceptor” to better suit the engine/electronics change.
Notice: I'm a bit further along than this post, so more will follow. The first few posts will be "catch up" posts.
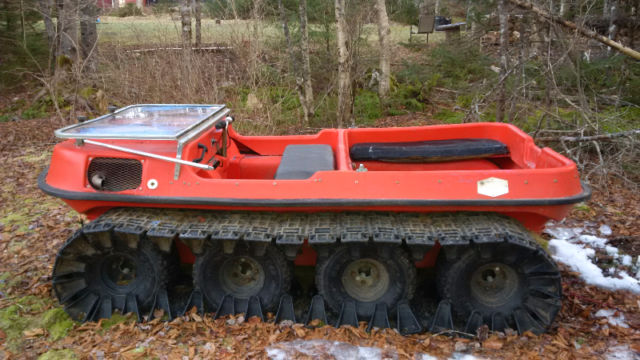
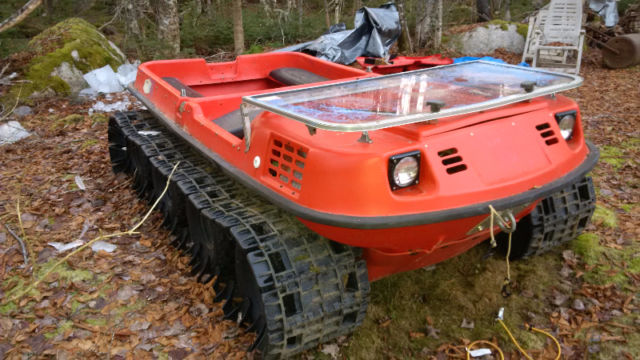
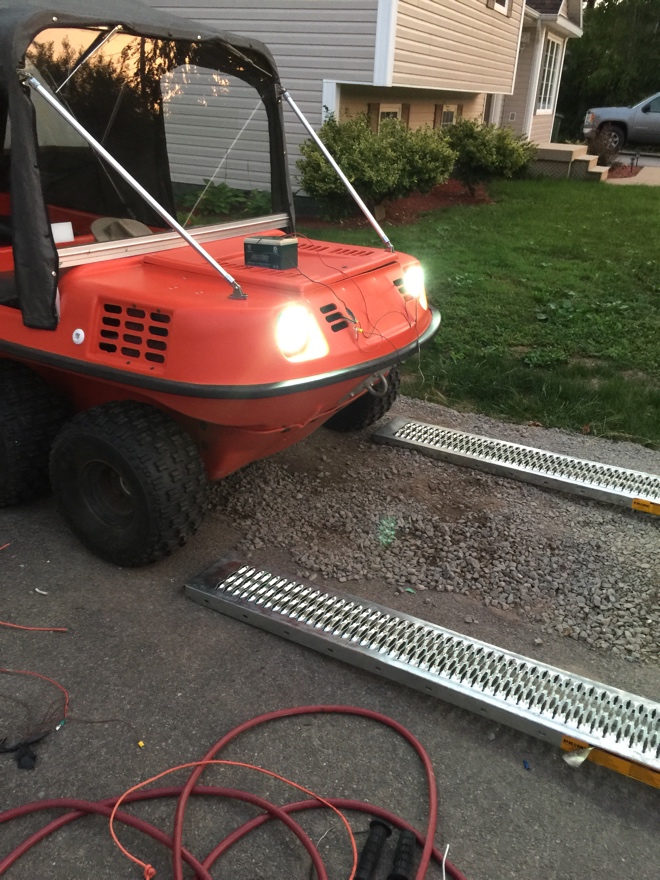
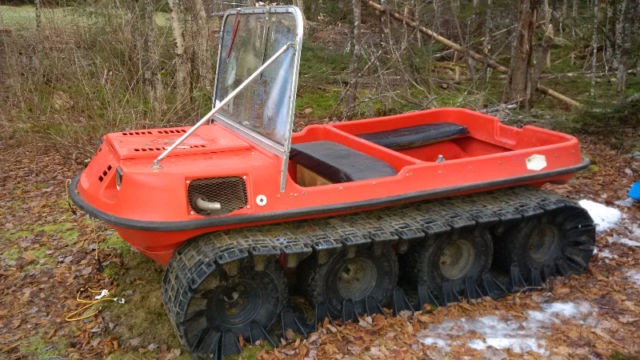
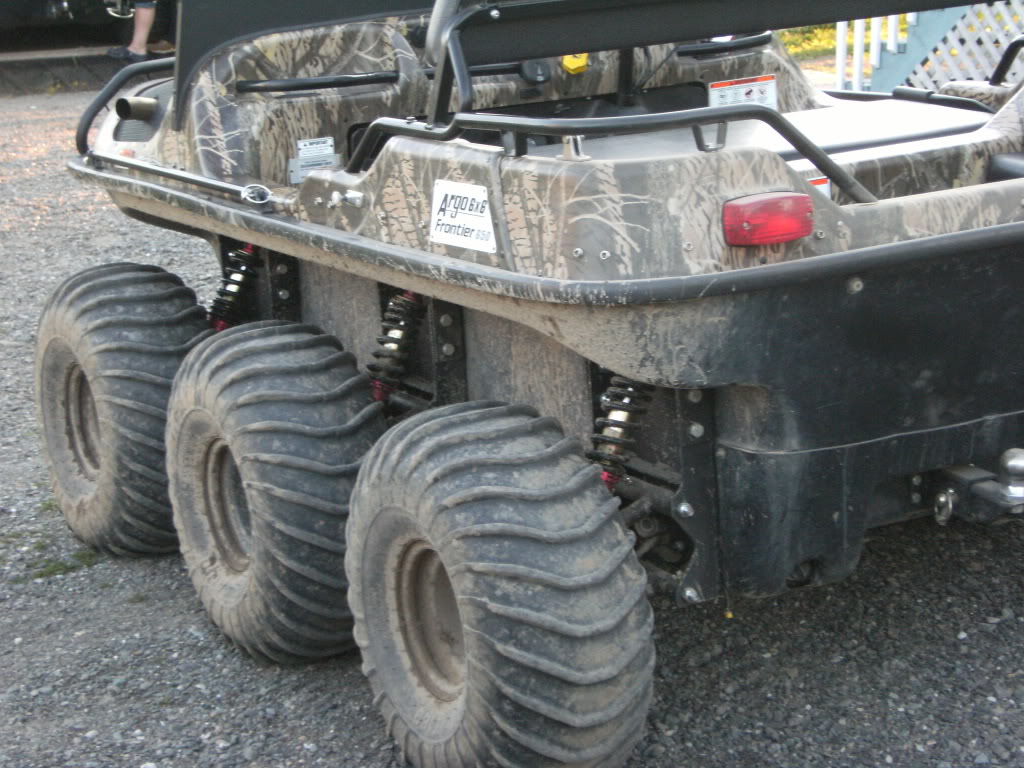
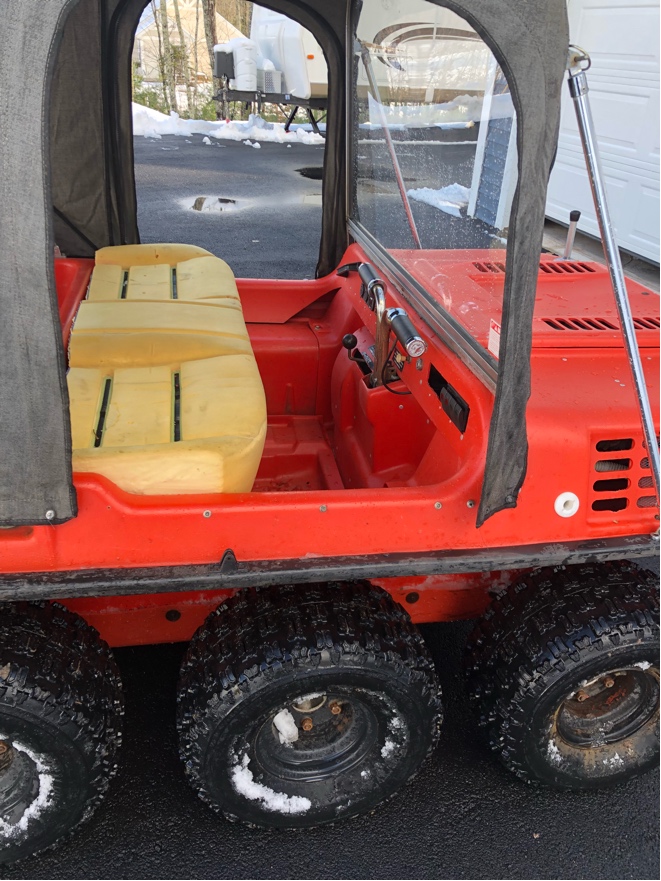
I've had an 8x8 Argo for a few years now. Here's what it looked like when I bought it:
Registration says "1986 Conquest", but the conquest wasn't built in 86. Looks to be a 1986 "I/C", short for "Industrial/Commercial".
Now, admittedly, I didn't know a lot about them when I bought it other than that they were amphibious. So what follows here isn't much of a surprise I guess. But an amphiib was what I was after as I was going to build it up to use it with Ground search. So I looked it over, it ran and drove poorly, but it at least it ran and drove.
So I dropped 3 grand on it and trailered it away. Before you gasp at that price, they are VERY hard to find around here and as such, are pricey. 3 G for a working 8x8 (with tracks) was a good price by what was available. New ones can tickle 30G and some go 35G if you option it right up!
I had to take the tracks off to get it on the trailer(too wide for my trailer), which wasn't a bad thing since the tracks were so loose the tires would spin in them when trying to turn or move and when you did get it rolling the track would slap the plastic body pretty hard. The track links were all seized, so I had to remove the front and back wheels to get the tracks off. Not a good start to our relationship.....
I hauled it right to our cottage on the eastern shore from the PO's place. Once there, I started shoveling out all the chain grease and grime and getting a better look at it:
Looks pretty neat! Like some kind of decremented Dune buggy! The wife thought I should put a big tongue on the front of it because of the "frog/puppy face" look of it. But it quickly became evident it was in worse shape than I thought.
The Kohler Magnum 18hp ran like crap so i took the carb apart, cleaned it and put it back together. It at least ran fairly good then.
The tires were knobbies, which I didn't think anything of when I bought it. Turns out knobbies are probably the worst tires you can put on a skid steer vehicle as they dig in and fight "skidding" like their life depended on it. So turning is often....lets just say....."interesting" and it's hard on the drivetrain because the knobbies put extra strain on everything. They also don't do a damned thing for water travel. I took it down to the harbor to check the hull for leaks and as soon as the tires lost grip on the bottom the whole rig would just spin around and drift off with the current. Fortunately, I had taken an oar with me and I was able to pole it back to where the tires could get some grip and pull us in enough to not be floating.
Then I noticed my feet were wet. Yup, leaking pretty good. I hit the bilge pump and...nothing. Getting thoroughly pissed now, I head out of the water, pop the hull drains and start back up to the cottage.
It's bloody hard to drive as the steering brakes are engaging at different points. Each lever (steers like a two stick tank track) engages at a different pull point. The steering brakes double as the stopping brakes. I get up a little speed and hit a dip. The thing goes absolutely nuts (tires are the only suspension) and the steering/stopping brakes not working right make it nearly impossible to recover. I hit another bump and we're off on a wild uncontrollable trip! We end up in the woods up against a tree and I'm nearly tossed right out of the rig.
So now I'm fully PO'd.
I get it back to the cottage, shove a board under a tire and go inside. I don't look at it the rest of the day. Just disgusted. Both with the rig and myself for feeling like I had allowed myself to be "taken".
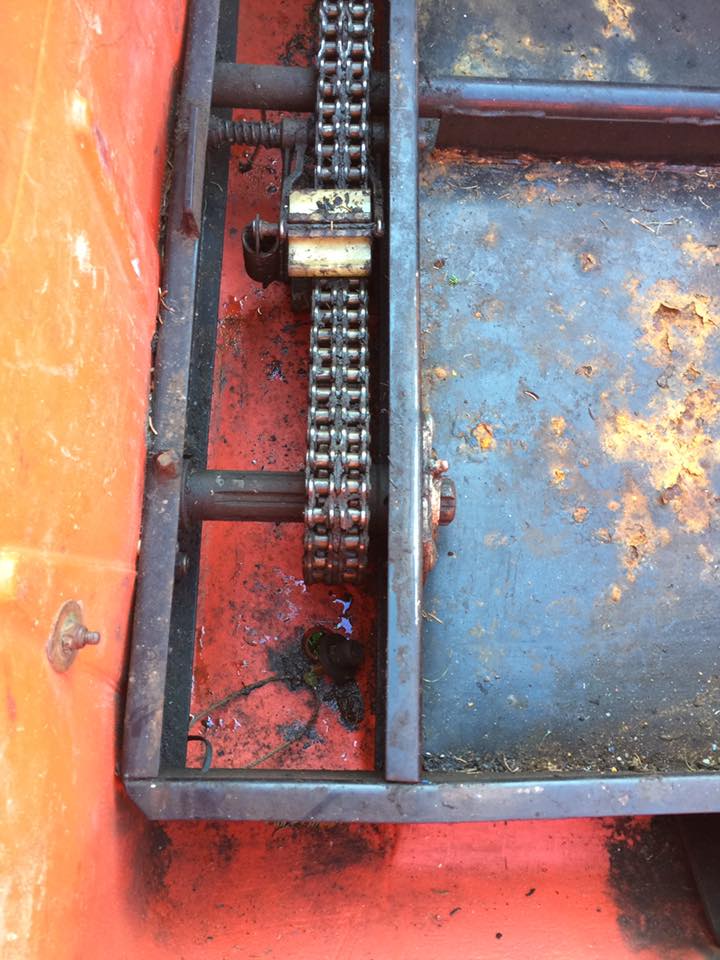
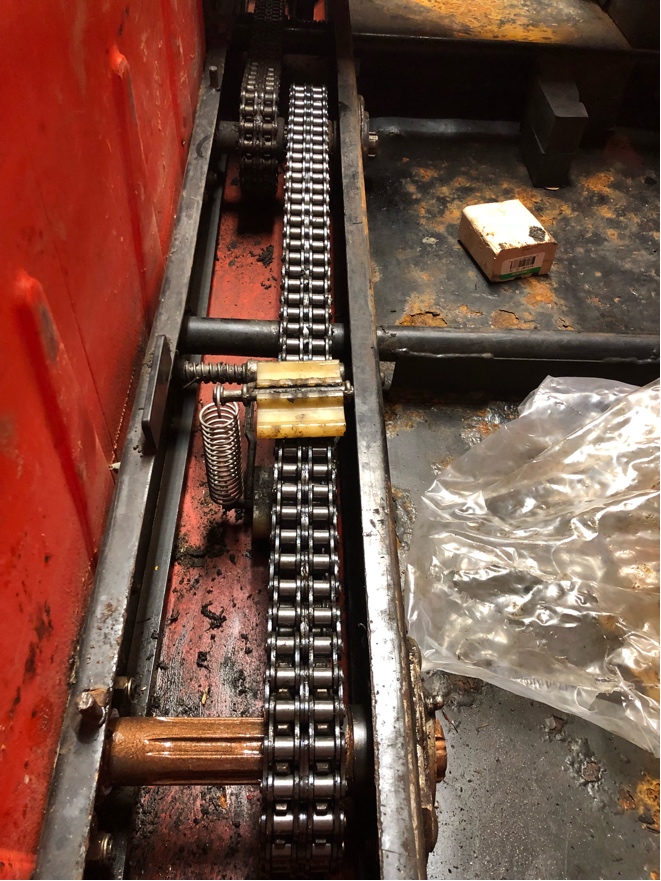
I get up the next day and give it another going over. The hull is intact, no holes or cracks. At least that's a good thing. The axle seals are all toast, so i know where the water is coming in. Then check the chains (and there are a lot of them):
A quick internet search for info and yup; they're stretched past the limit of the adjusters. ALL of them! They're hitting on the frame crossmembers, the plastic tub and banging on the floor panels.
Ugh.
There's around 30+ feet of chain in there. #50 double roller chain.
Yeesh.
That's not going to be cheap to fix!
Then I check the wheel bearings IAW some "Argo forum" guidance. Yup, all 4 outer wheels have roached bearings. Ugh. I price them out online with a few Argo sites. 85 bucks a piece! That's USD without shipping! I'm looking at 150 CAD a bearing and there's 16 of them (two per shaft, inner and outer) in total! Yipe!
So now I'm completely gutted. I can't stand to look at it now. I just load it up on the trailer, ignore it for the rest of our time at the cottage and drag it home at the end of the week. Disgusted, I don't touch it for another month.
When I can stand to look at it again, I start adjusting things. The steering/stopping brakes are a simple adjustment to get right and now it mostly steers, except for those knobbies fighting me.
Then into the wiring. There's 2 bilge pumps and a sort through the wiring gets them both running. I fix lots of other absolutely scary electrical issues.
I go through several other systems and the rig gets a little stronger with every fix. Last guy didn't know his head from his arse with lots of things on this thing and I'm getting an unexpected education because of it.
I keep checking on chains, sprockets, seals and bearings. Stupid expensive everywhere. Adds up to almost more than what I paid for the whole rig. So I stop looking and move on to other things.
Tires, lets check on tires: Holy F word!
You can only get the Argo tires from Argo! they have them under license and no one else can make them. I'd have to spend like 1500+ to get 8 of them for my rig. Yeah, lets park that one for a while and think about it. The knobbies will do for moving it around and holding it up off the floor for the time being.
Eff Argo and their stupid prices! It's like an "Apple" monopoly on parts it seems!
I install a switch panel, hourmeter/tach and a voltmeter/power port:
Then I grab a couple LED spots and replace the old, burned out lights:
Starting to feel a little better about the Argo now that I'm seeing some improvements.
The CV clutch is worn so that it never disengages. Weak spring. So I spin up a spacer to shim the spring and things are working much better with engagement. It's at least controllable now and the transmission doesn't "crunch" every time to try to shift it.
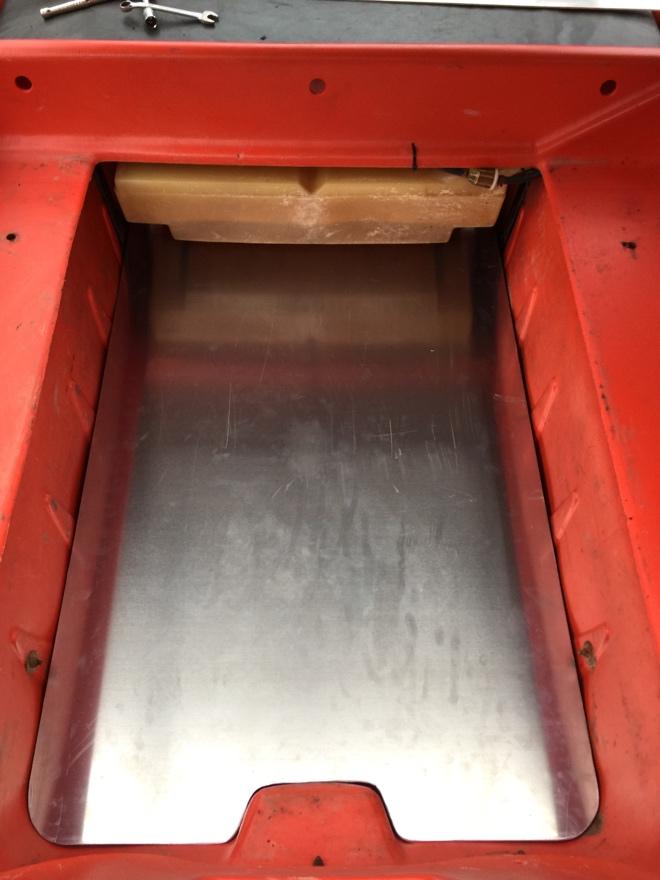
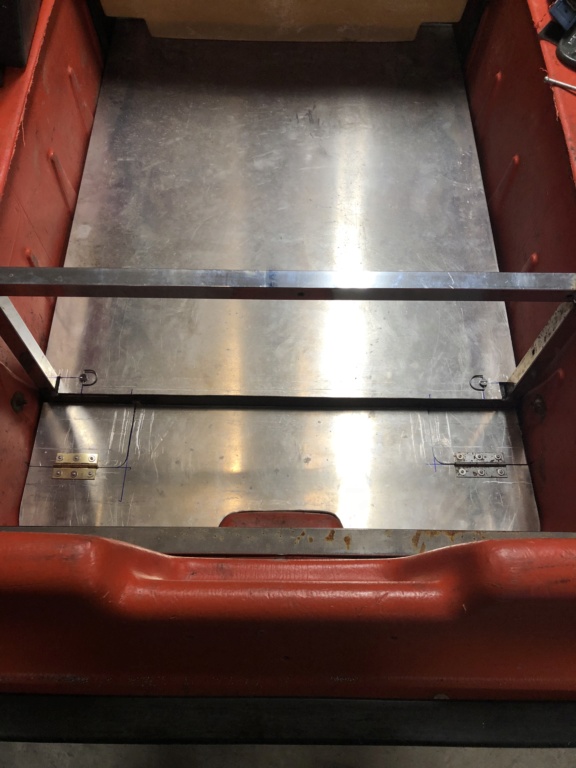
It came without a rear floor pan, so a nice sheet of 1/8" aluminum makes for a nice flat floor:
Much better!
to be con't.....
Last edited by TourMax on November 25th 2018, 5:20 pm; edited 1 time in total
Crazy_Carl Veteran Member
2018 Build-Off Entrant
2018 Build-Off Entrant
2500+ Posts
2500+ Posts!
2024 Build-Off Entrant
2024 Build-Off Entrant
Age : 35 Join date : 2017-10-30 Points : 5140 Posts : 2561 Location : Rochester, New York
Sounds like it was bought as "runs and drives" but ad should have read "no maint, needs full rebuild. I've always been curious about these things. Seems like a decent deal for 3G though.
I'm pretty much just going to jump to current day status on the Argo, as not much has happened between the stuff in the first post and last week. I'm in the middle of retiring from the military and we built our retirement home, so the Argo was pretty much shelved until now.
I've got plans for the old rig, but I need it running and basically sound before going any further with it. So I started searching for chains, bearings and seals.
Finding Argo stuff at affordable prices was just not going to happen. But this stuff is not rocket science and I highly doubted the bearings, chains and seal were made by Argo, so they must be available somewhere else.
Turns out the bearing numbers are UC206-20. That's a pretty common bearing in agricultural use. The chain is #50 double row, another common thing in agricultural and industrial use.
So I head on over to my local small engine shop. I live in a rural and agricultural area, so they sell bearings, seals and lots of assorted stuff.
I ask my parts guy for the bearings and he knows exactly what I need. 20 bucks a piece. That's a far cry from 100-ish per bearing. 60 bucks gets me a 10 foot length of #50 double roller chain. 10 feet is enough to do both sides in the rear of the Argo.
Seals? He finds me a double lip spring seal with 1.25 inner and the right size outer housing. 8 bucks a piece. So, for a tick more than 200 bucks, I get 4 bearings (the rest are in good shape), 8 seals and a 10' length of roller chain.
Now we're talking! I though all that stuff looked familiar.....standard agricultural stuff except they stamp an Argo part number on them. Eff you Argo! I hate it when companies throw unreasonable mark up stuff. Just dirty pool all around.
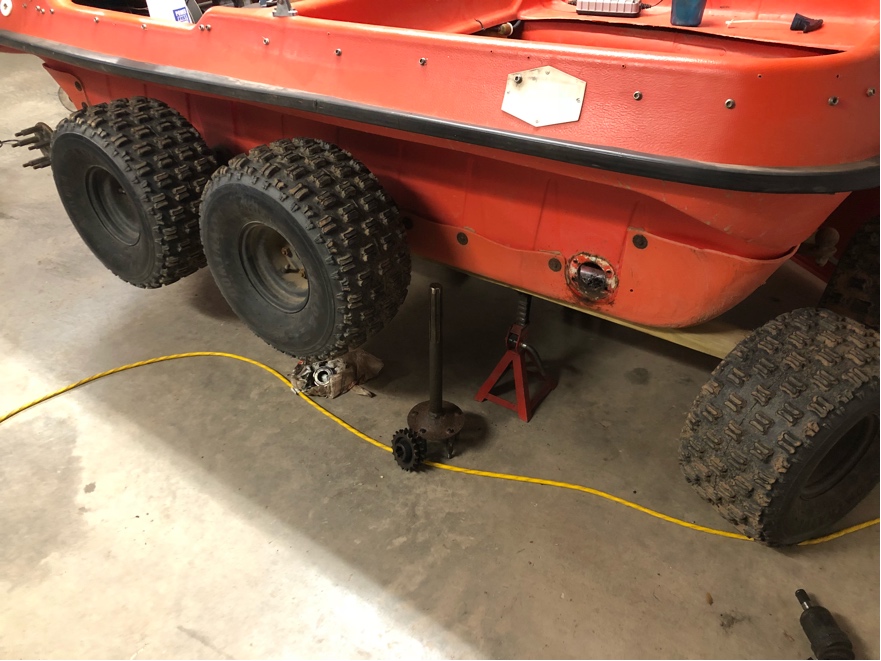
So I drag it into the garage and get it up on jacks:
It doesn't have a "frame" per se, So I have to jack it up and run two 2x4's underneath it. Then I put 4 jack stands under it and it was solid enough to work on.
I can tell someone has had it apart at least once, which isn't surprising seeing it's a 1986. But everything is rusted solid now. It's a repeat of the MUT's frozen wheel hubs all over again. Heat, pullers, penetrating oil, paraffin wax, etc. Nothing works. But after about 8 hours of beating on it, I finally get the sprocket to move a fraction of a MM. Game on!
The only problem is I have to beat on the axle end with a 5lb sledge to get it to move. I end up "mushrooming" the axle end, so I have to take the grinder and a file to it to finish getting the sprocket off.
But at this point all I care about is that it's out:
With it out of the body, changing the bearing, seal and chain is a snap.
Before:
You can see the adjuster spring is completely collapsed and the chain is rubbing on the frame crossmembers. Totally worn out.
After:
Much better!
I usually change out sprockets when I change out a chain, but some reading reveals it's fairly standard practice on Argo's to just replace the chain as long as the sprockets aren't "shark toothed" or pointed. I put it back together with a generous slathering of copper anti-seize.
I'm doing the RH rear today and it's the same as the LH side. Sprocket was rust welded to the axle and didn't want to move for the life of it. I didn't mess around this time and went right to heat, oil, paraffin and beating on the end of the axle with the sledge hammer. I just accepted that the end was going to be mushroomed and ground it off when I needed to. Only took 4 hours to break it loose this time.
Now I'm about head out and put it back together. That's the easy part.....lol!
All I have to do is the two front axles and the bearing replacements are done.
Changing out the stretched middle #50 chain will be easier because I only need to change the chain. The two middle axle bearings are still good. But I may change out the seals (for water tightness), which mean the axles will have to come out. I'll see how the fronts go first. If the piss me off too much, I might not have enough "enthusiasm" left to pull the two inner axles.
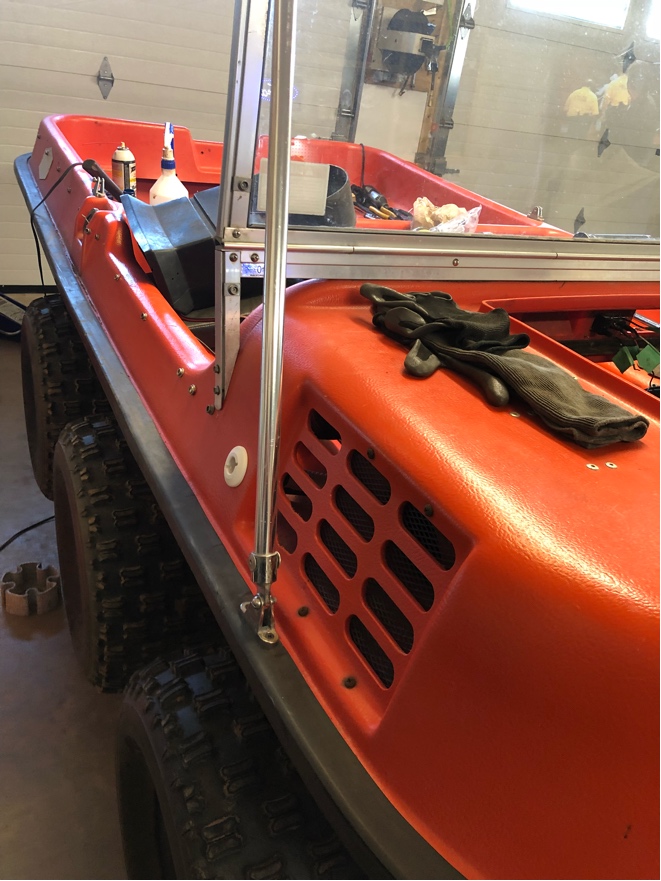
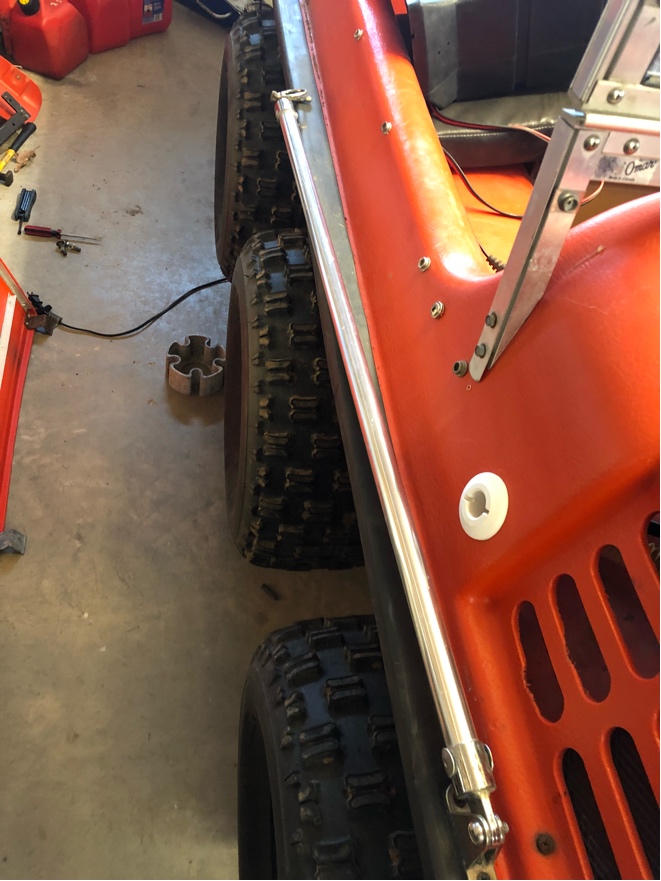
The PO had also mounted the windshield support struts to the upper body by the hood:
They're actually supposed to be down on the body split at the rubber seal. Because he had put them in the thinner upper body, they had torn free a couple times and that just wasn't going to work any longer. So I moved them down to where they should be:
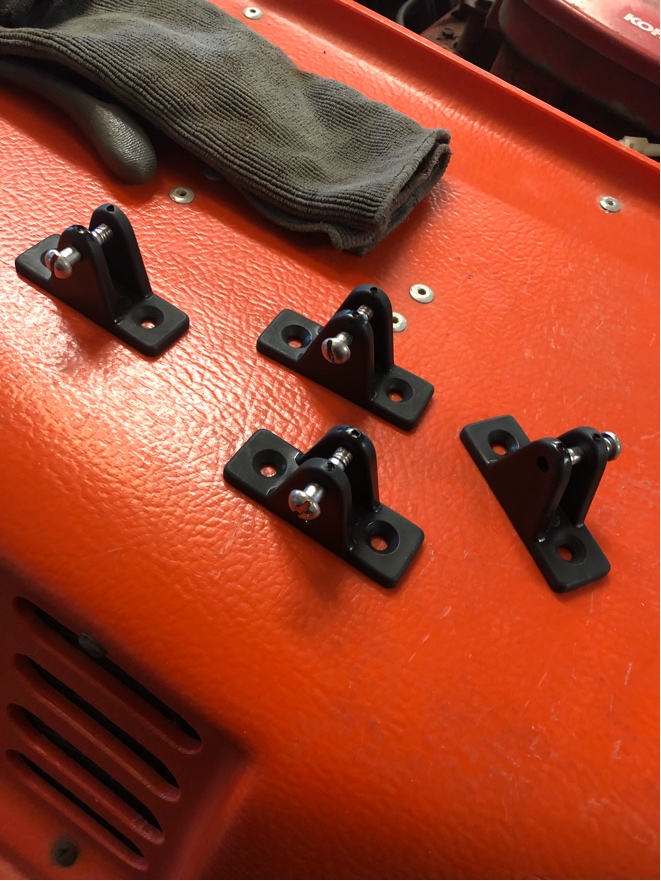
But since the PO had installed them wrong, He (or someone before him) hadn't installed the holders at the back so you can secure the strut when you fold the windshield down:
Yup, I needed a couple fixtures to stow the struts now. I cruise the Argo parts sites.
YIKES! 50 bucks for one fitting!
Yeah, problem for Argo and their over-hyped prices is I recognize those little pieces. They look suspiciously just like the fittings that mount things like folding tops on boats. I drop into a local boat shop and sure enough:
4 bucks a piece. Effin' Argo strikes again. I grab 4 of them. They're plastic instead of pot metal, but I could care less for a difference of 46 bucks a piece!
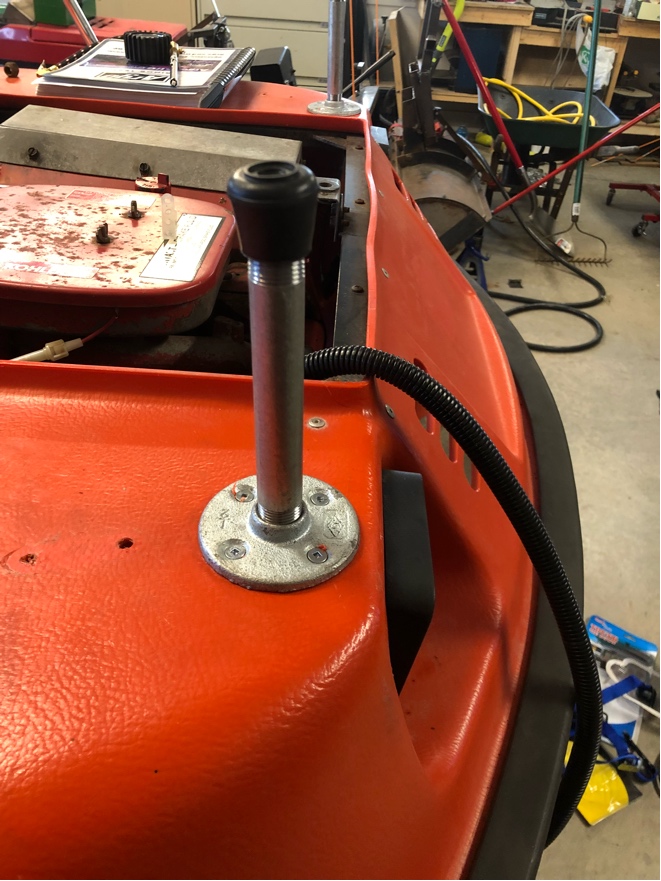
Next, the Argo is supposed to have little posts up front to rest the windshield frame on in the folded position and straps to keep it from banging around. You could see the holes in the plastic where they used to be, but someone had long since removed them. I'm going to say it was the PO as they could be seen on the Argo in the for sale ad and he had another Argo in the back yard under a tarp. I'm also betting that's where the original rear floor pan went. Whatever, I needed those posts.
I didn't even bother to look for Argo parts, knowing they were going to be stupid expensive no matter what they were made of. I thought about making something on the lathe, but ended up just going to the hardware store and grabbing a couple galvanized fittings and some chair leg covers:
Yup, that will work nicely! I'll just throw the uprights in the lathe and cut them to the proper length. I picked up a couple straps with cam buckles at the surplus store for a couple bucks and that will work for the hold downs.
Hopefully, after today, it will at least be mobile again and I can get it out of the garage for a quick shake down....
So, what are the future plans for the old Argo once I get it back in to fighting trim? Everyone knows I have to have plans for it.....I can't leave anything stock.
Well, first off, the Argo is pretty rough with only tires as suspension. That also limits speed as you can only go so fast and maintain control. It tops out at 20 mph anyways, but plans are for more speed than that. So I need to get it more under control.
Turns out, someone has already created a solution to the suspension problem. They call them Argo "springers":
I've already started collecting parts to build it. Basically, I've got a pile of Honda Rubicon 500 parts. CV axles provide for suspension articulation, the Rubicon is rated for 500 lbs on 4 shocks and the argo is 1000 lbs on 8, so 8 Rubicon shocks should be close. Hubs are off the Rubicon and wheels will be Honda ATV rims with 25" tires. The rest is all fabricated parts to make it work. Easily done on my metal lathe and with the MIG.
Next up is the engine. That Old Kohler Magnum is a tough old bird. But it's loud, hot and tired. I know I mentioned elsewhere that I was going to build a buggy with my 1985 VF750F. Well, the original plan was to put it in the Argo, but with a twist and withthe Buggy build on possible permamnet hiatus, looks like the "ArgoCeptor" is back on the table. The Argo has the engine and transmission in front. That makes it super nose heavy and it floats very nose down. Not great for water travel, entering/existing water, any time the front catches any air, etc. So plan is to flip the frame front to back and rear mount the transmission and VF750f engine in the rear. I'll loose some cargo/Pax room in the back, but will gain the engine bay area up front for covered storage.
The VF has 5 forward gears and the Argo transmission has a high, low and reverse. The Argo transmission is also what allows it to skid steer and brake. So feeding the VF into the Argo transmission will give me reverse, as well as a total of 10 forward gears. I will likely delete the CV clutch since the VF has a clutched transmission already. Not completely sure which way I will go with that one yet though. The Argo transmission should be fine with the torque as, oddly enough, the VF engine doesn't make much more torque that the Kohler and the peak torque of the VF isn't at a much higher rpm than the Kohler. the Kohler makes lots of torque, but not much HP. The VF does make 88 hp compared to the Kohler's 18, but that's up at 9500 rpm and I'll never have it up that high in the Argo. At aroudn the Kohlers max RPM, the VF is making roughly double the HP as the Kohler, but only a bit more torque.
Lots of other plans, but that's the broad strokes that will take a looong time to complete.
Changing an axle bearing and seal is turning into a full day per axle ordeal!
Tried to change the last bad bearing and seal today. The forward LH one.
Problem is, that is burried under hte engine exhaust and toque converter connection to the transmission. Add to that the fact you have to jack up the Argo to get the tires off and the engine cowling makes it high enough you need a step stool/box to get to the engine bay opening to reach down to the very bottom of the hull where the axle/sprocket/chains are!
AUGH!
Now toss in the fact that everything is rusted together solid and nothing is easily accessible (it's like working on something in the bilge of a boat hull) and you want to park a .45 in your skull at the end of every day!
I really wanted it done for today too. It snowed today and nothing is as fun as playing in the snow with a skid steer 8 wheeler.
Grrrrr.........
Let me give anyone this bit of advice if they are thinking of buying a used argo:
Have lots of money on hand for parts and make sure you don't need to use it any time soon after buying it. You can take for granted it's going to need bearings, seal and chains. If it doesn't have the Argo paddle tires, you're going to need to buy a set of those too for it to operate as it should.
A used Argo is a money pit and a source of incredible frustration. Great fun when you're done, but it's a pretty rough (and expensive) road getting there.....
So I finished up what I've been working on the last few days.
Axle bearings, axle seals, chains, etc.
Did some work on the electrical system. Nothing major, just a quick cleanup. Some of the tires were leaking down, so I fixed that and set the pressures at 2.5 psi.
Fixed the windshield attachment points. The base was loose and the struts were in the wrong place and partially pulled through the body. Tightened up the soft top attachments, pushed it all into the zippered storage pouch and fastened that to it's button snaps.
A few adjustments to other systems like the brakes and then I buttoned 'er up.
A test ride was in order and we got a nice coating of wet sloppy snow last night. Perfect for the Argo with it's knobby tires. Plenty of grip available, but greasy enough to let it turn fairly easily.
So off I went down the road and into the sand pit at the end of the street. Lots of looks and smiles from guys as I pass by. Argo's aren't very common around here and it's not normal to see one go by.
Ride is much better. Not a noisey as it used to be, which I guess I account to the chains not slapping around and bearings not rumbling and growling. It's still not what could be called "quiet", but it's much more livable than it was.
Steering is still skid steer "jerky", but it's much more progressive than it was. Probably down to the chains not being as sloppy as they were.
It's even easier to keep it straight for longer periods, I'm guessing due to the tire pressures being even and the bearings not being "floppy" anymore.
Even the change in the windshield attachment seems to help. With it not rattling, banging and flopping like it used to, the ride is just more "pleasant" all around.
You know, I actually had fun with the little bugger! the snow seemed to level the ground out a bit so not much bouncing. At least not like the last time I fired it across hard pack ground at speed.
I was able to wind it out to top speed (which is only around 15-20 mph) and still control it. Not much in the way of jarring the old bod like it used to.
So I've got a few more chains to change out and some electrical work to finish up. It can only make the ol' Argo stronger and more enjoyable to use than it is now.
I've been thinking more about the VF750F engine swap into the Argo and I'm starting to reconsider the idea of changing it to rear engine mounting.
I'm thinking I might just pull the Kohler Magnum out and drop the V4 into the forward engine bay. That would be the easiest way to go. I can still shift some weight to the rear by moving the battery and the fuel tank. Right now the battery is up in the engine bay and the fuel tank is under the front seat.
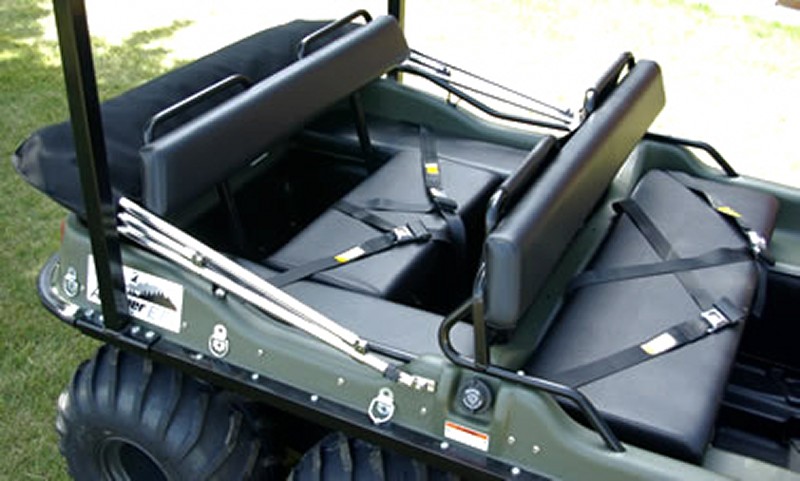
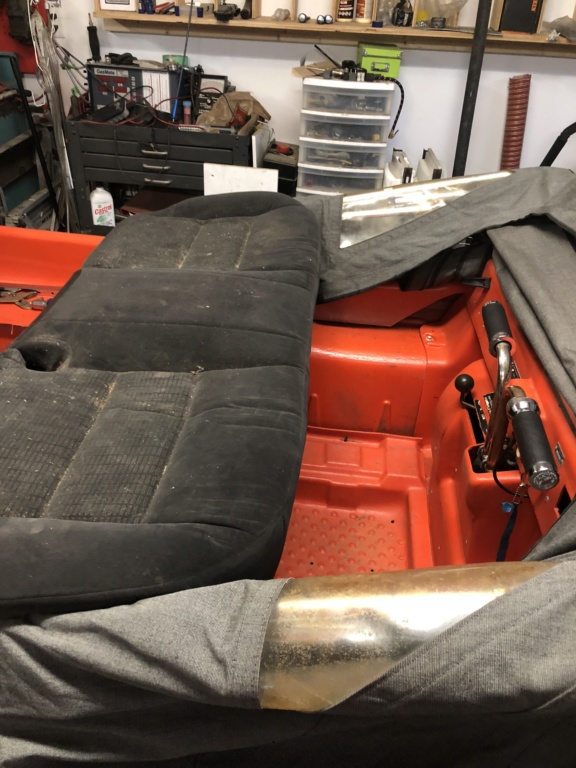
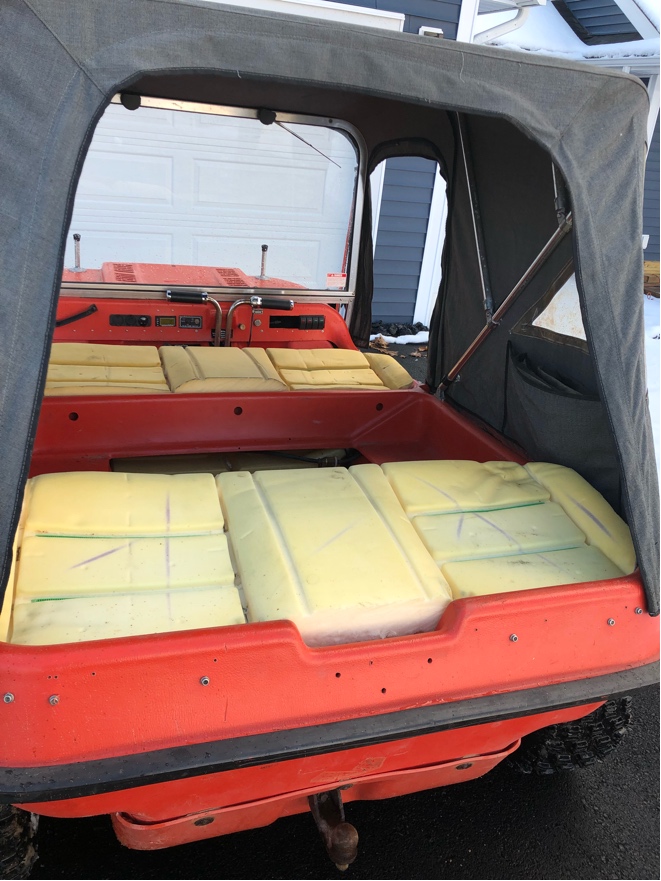
The Argo currently has bench seating on each side like so:
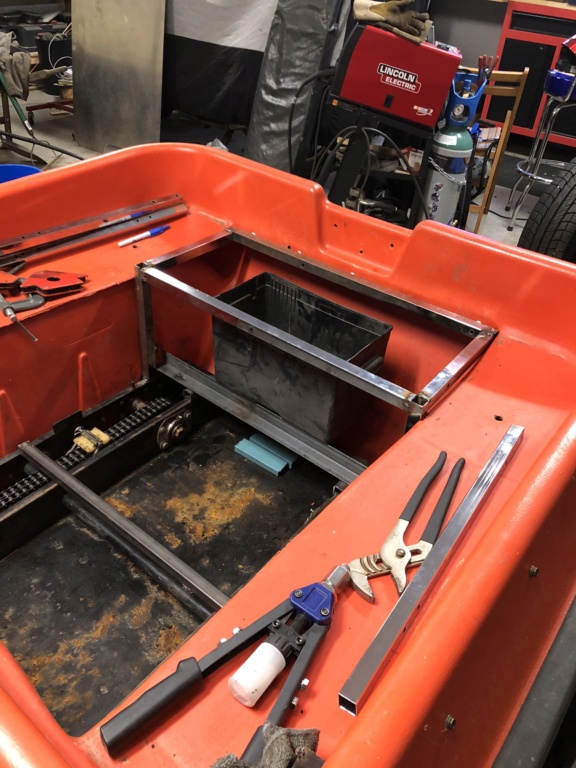
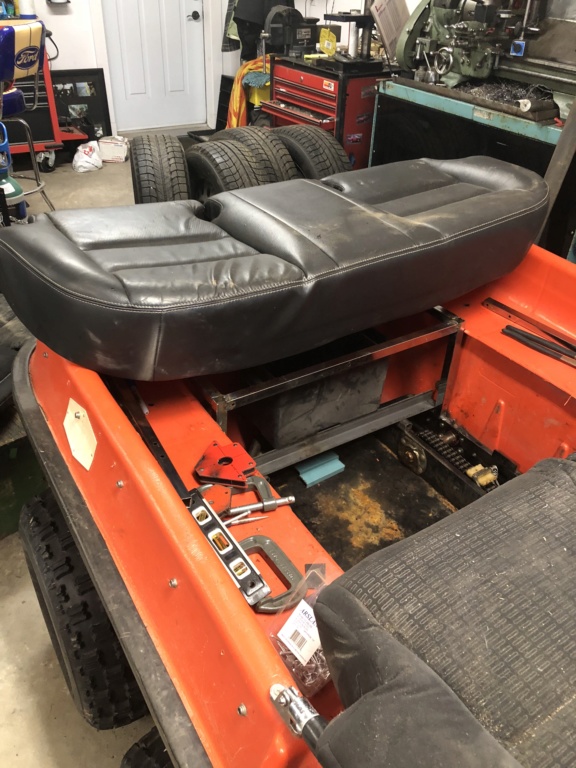
What I'll do is add a cross bench seat at the rear, like so:
Under that seat will be the fuel tank and a full size battery. The space under the front seat will get a box and become storage space, something that is actually pretty lacking in the Argo as it is. Lots of space in it, but no compartments for actually storing items.
Crazy_Carl Veteran Member
2018 Build-Off Entrant
2018 Build-Off Entrant
2500+ Posts
2500+ Posts!
2024 Build-Off Entrant
2024 Build-Off Entrant
Age : 35 Join date : 2017-10-30 Points : 5140 Posts : 2561 Location : Rochester, New York
Well i went looking for seat foam today to build the new front and rear seats.
Yeah, they want an awful lot of money for just “foam”. Lets not forget that “foam” is essentially just air caught in some oil.
A piece dense enough to actually work as seats and large enough to just do the front and rear seat lower portions is $100! Plus 15% tax!
Ridiculous! And that’s the least expensive place!
Yeah, pretty sure I can figure out something else that doesn't cost a left nut for just a block of square foam.
So I head off to my favorite junkyard. Turns out rear seat bottoms are more of a PITA to them than they are anything else (essentially, no scrap value).
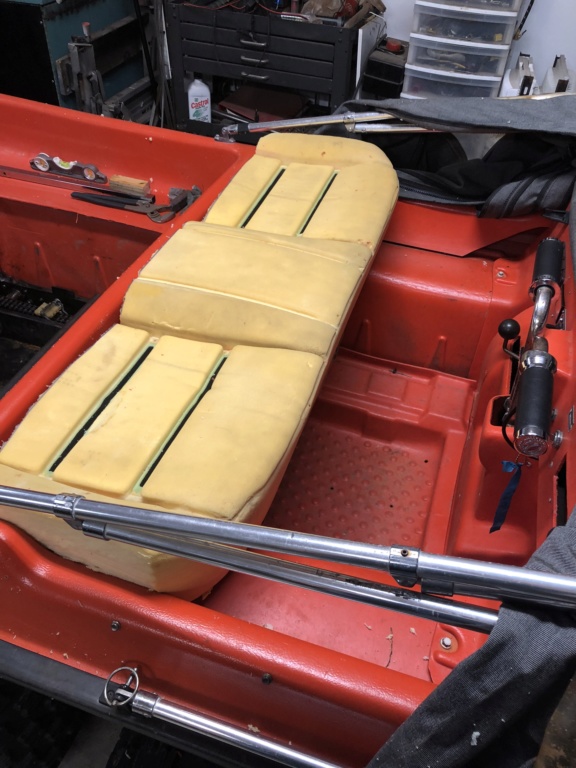
I dig around and find a long row of Ford Fusions. Rear seat bottoms are nearly 4” thick at the thin point and 6” at the thickest point.
60 bucks cash and I’m walking out with 4 seats.
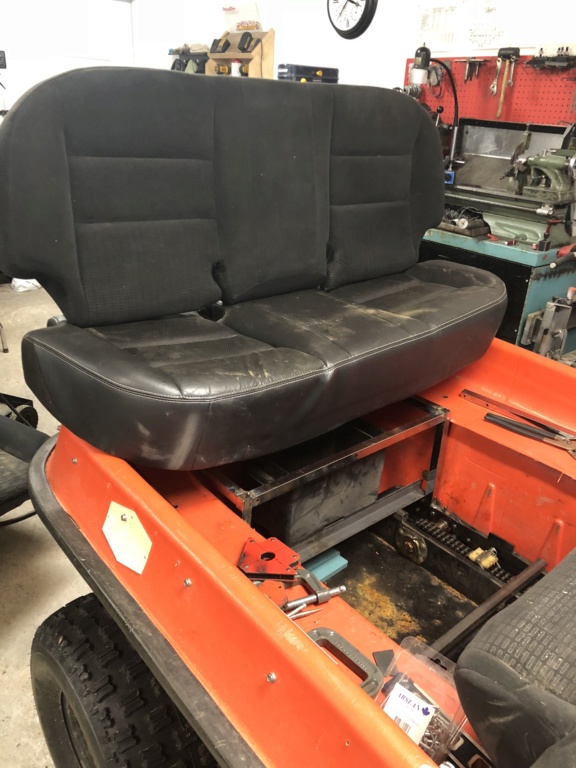
They’re about 4” too wide for the argo and about 3-4” deeper than needed:
But I wasn't planning to use them “as is”. Thats just not how I do things, it has to look like it shoukd be there from the factory or I do ‘t want it. It was highly unlikely that I was going to find a car seat that just drops in to the Argo like it was meant to be there, so I was planning of modifying something from the beginning.
I can shave 2” off each side and they will drop in between the body sides.
4” off the back edge and they will be just deep enough to be comfy. The back edge is the thiniest and has big cutouts for the car seat belts anyways.
A little work shaving and shaping at the cuts and they’ll look factory made when under the new seat upholstery. I’ll keep the “semi-bucket” look of the Fushion seat contours, just for asthetics as much as anything else. Will look much nicer than just a flat foam bench.
Two will also work for seat backs, once I trim them down to something that looks a bit more “Argo” and a lot less “redneck”.
Some fabricated steel frames will bridge the gap between Ford and Argo to make it all work together. If I have room, I may even try to build a bit of a spring mount into the frames. I’ll have to see how high they are with just the foam before deciding on that one.
The finishing piece will be some stitched up leather seat covers. I’ve got two full hides of leather seat upholstery left over from another project. I bought two full hides on clearance at the leather shop a long time ago and the planned project never happened. So I’ve been dragging these hides around for about 5 years now, looking for something I can use them for.
The leather cover thats on the one Fusion seat will serve as a template for me to stich the new covers from.
The leather I have is dark gray and a light beige/gray, so I’ll do it dark gray with light gray inserts. I would have preferred black seats, but those two gray hides are several hundreds of dollars just laying around and a couple black upholstery hides are going to be just stupid expensive.
So, the Argo gets two tone gray seats to go with the orange plastic body.
How do you think it will drive with a seat to either side and the bars in the center for steering?
The seat looks really comfy though. You keep saying how you wish you had suspension. The extra foam looks like a great temporary solution until you build your suspension.
How do you think it will drive with a seat to either side and the bars in the center for steering?
The seat looks really comfy though. You keep saying how you wish you had suspension. The extra foam looks like a great temporary solution until you build your suspension.
The bars are actually offset to the rh side, but I plan to move them over to the rh side a bit more.
The front part is spaced up 1” to clear the chain tensioners and fastened by the two cam lock fasteners you see at the back. The very rear piece is just sitting there to give it a flat floor and the hinged doors on either side are for access to the drain plugs.
Took it our for a burn and the seats do their job well! Almost all of the banging and jarring is gone out of the ride.
I opened it up and got to max speed whipping across uneven ground. I hit a big hole (hidden under the snow) and unintentionally got some serious air (for an alArto that is, lol!)
Now, I'm not going to say it was fun, but where before it would have hurt me quite a bit, it was now just a big bounce and rough toss around the cab.
You do sit a fair bit higher than before and you're best to stay off the center raised portion of the seat (sits even higher) but it's 10x better than it used to be.
I'll just make the sticks a little taller and slide them to the RH side a little more and it will be near bang on.
Last edited by TourMax on November 22nd 2018, 8:52 pm; edited 1 time in total
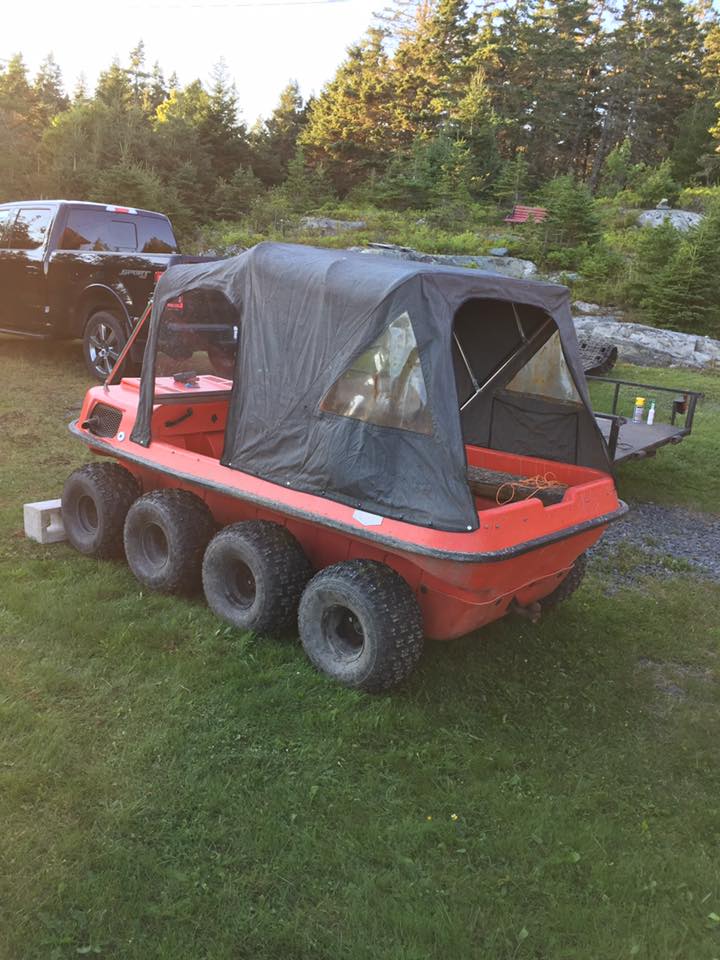
This is a first I'm seeing of the cab on this. Looks a lot like the homemade cab on the amphibious vehicle on ATLTF. Looks nice and roomy and it's good to hear the ride quality is way better with the new seats.
This is a first I'm seeing of the cab on this. Looks a lot like the homemade cab on the amphibious vehicle on ATLTF. Looks nice and roomy and it's good to hear the ride quality is way better with the new seats.
Ummm, look at the 3rd and 4th picture in the 1st post......
RichieRichOverdrive Moderator
2500+ Posts
2500+ Posts!
2018 Build-Off Entrant
2018 Build-Off Entrant
2024 Build-Off Entrant
2024 Build-Off Entrant
Age : 21 Join date : 2016-10-29 Points : 6634 Posts : 3646 Location : Lewisburg, KY
Looks like it's working up to be an awesome rig. I've had that problem of companies having their own part number and marking up stuff before, especially with bearings. Usually find a way around it.
Any news on the tracks? Waiting til you have good tires to put them over?
Looks like it's working up to be an awesome rig. I've had that problem of companies having their own part number and marking up stuff before, especially with bearings. Usually find a way around it.
Any news on the tracks? Waiting til you have good tires to put them over?
Theyre just sitting in the shed. You dont need tracks on the Argo for snow until it hits around 6” to a foot.
Besides, right now its too much fun spinning and sliding around to want to put the tracks on...
Last edited by TourMax on November 23rd 2018, 6:17 am; edited 1 time in total
Doing custom seats is something Id love to learn how to do for projects like this, youve done a great Job so far
Its not that hard really. You cut your pattern and then the machine does all the sewing for you.
The only problem I have is I don’t have a walking foot sewing machine at home to work with the leather. So I’ll probably have to use the “waxed paper trick” to do my leather work...