The pulley is 3.75 inch I was actually shooting for 4 or 4.25 but this one had double grub screws including one on the shaft key which was far superior.
Also the bolts for the pulleys have been left long so I can simply put guides on the bottom. Something that I have found to be far superior as a mechanic. Some mower models tend to have this standard so you can replace a belt without loosening pulleys. I even cut away the old guides because of this.
This is partially the reason why it's taking so long to do some simple tasks. As a mechanic I know what works and what doesn't work but more importantly sometimes we receive attachment or upgrade kits without any instructions and you will be forced to engineer it so that it Will last a lifetime.
Iam trying to apply the same to this machine Actually the shift linkage is not really to my liking as I find the throw too short and I have other plans but will leave it until I find a way to make something that has 0 play in the linkage.
fbisurveilancevan Member
Age : 37 Join date : 2022-05-20 Points : 972 Posts : 220
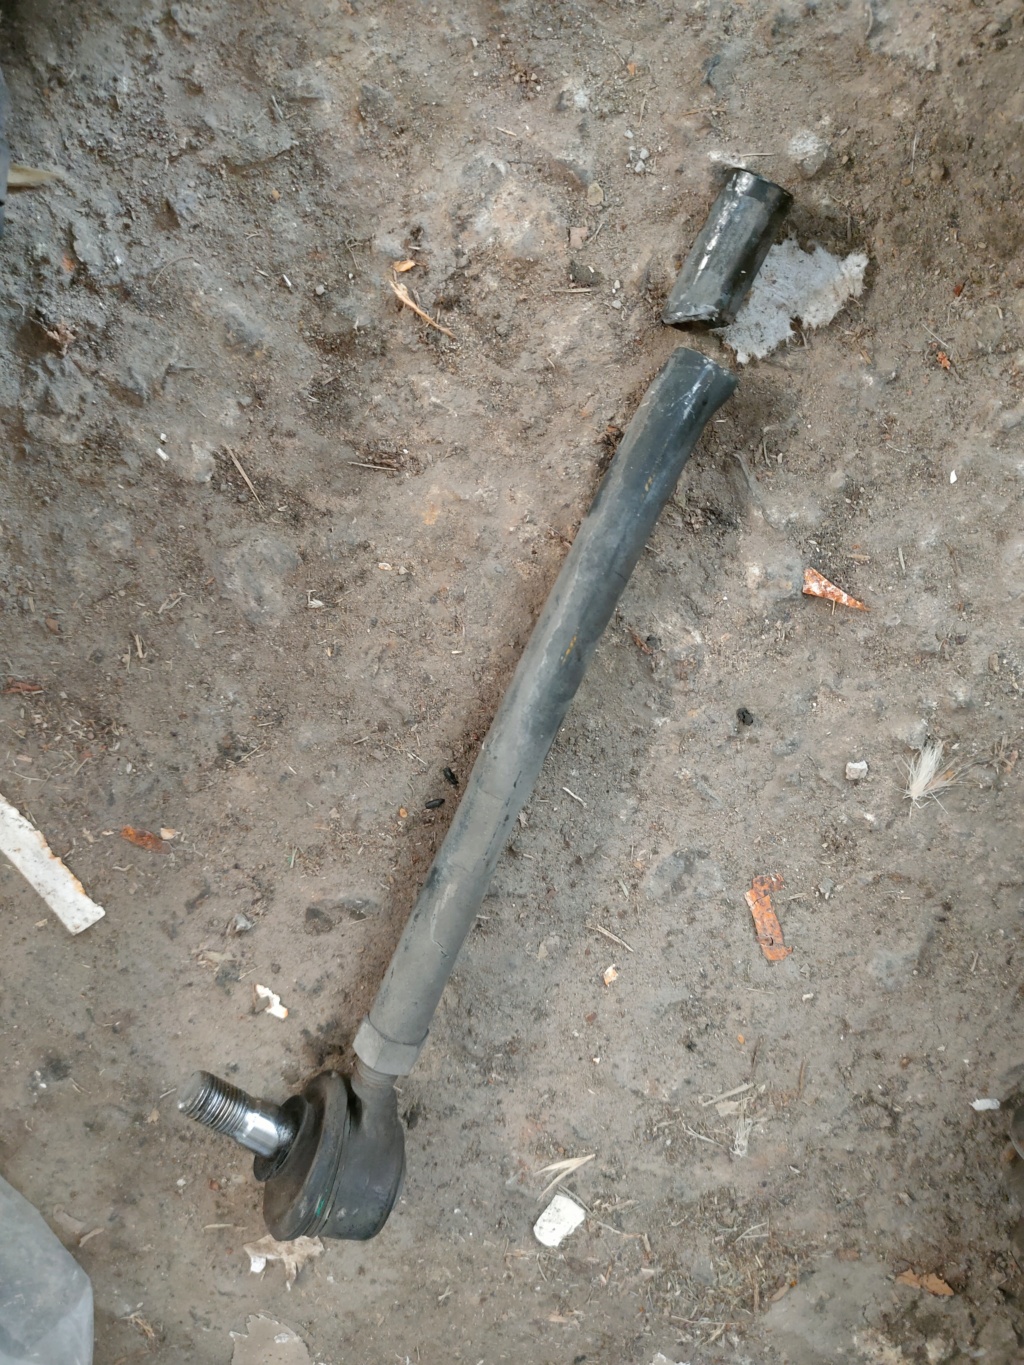
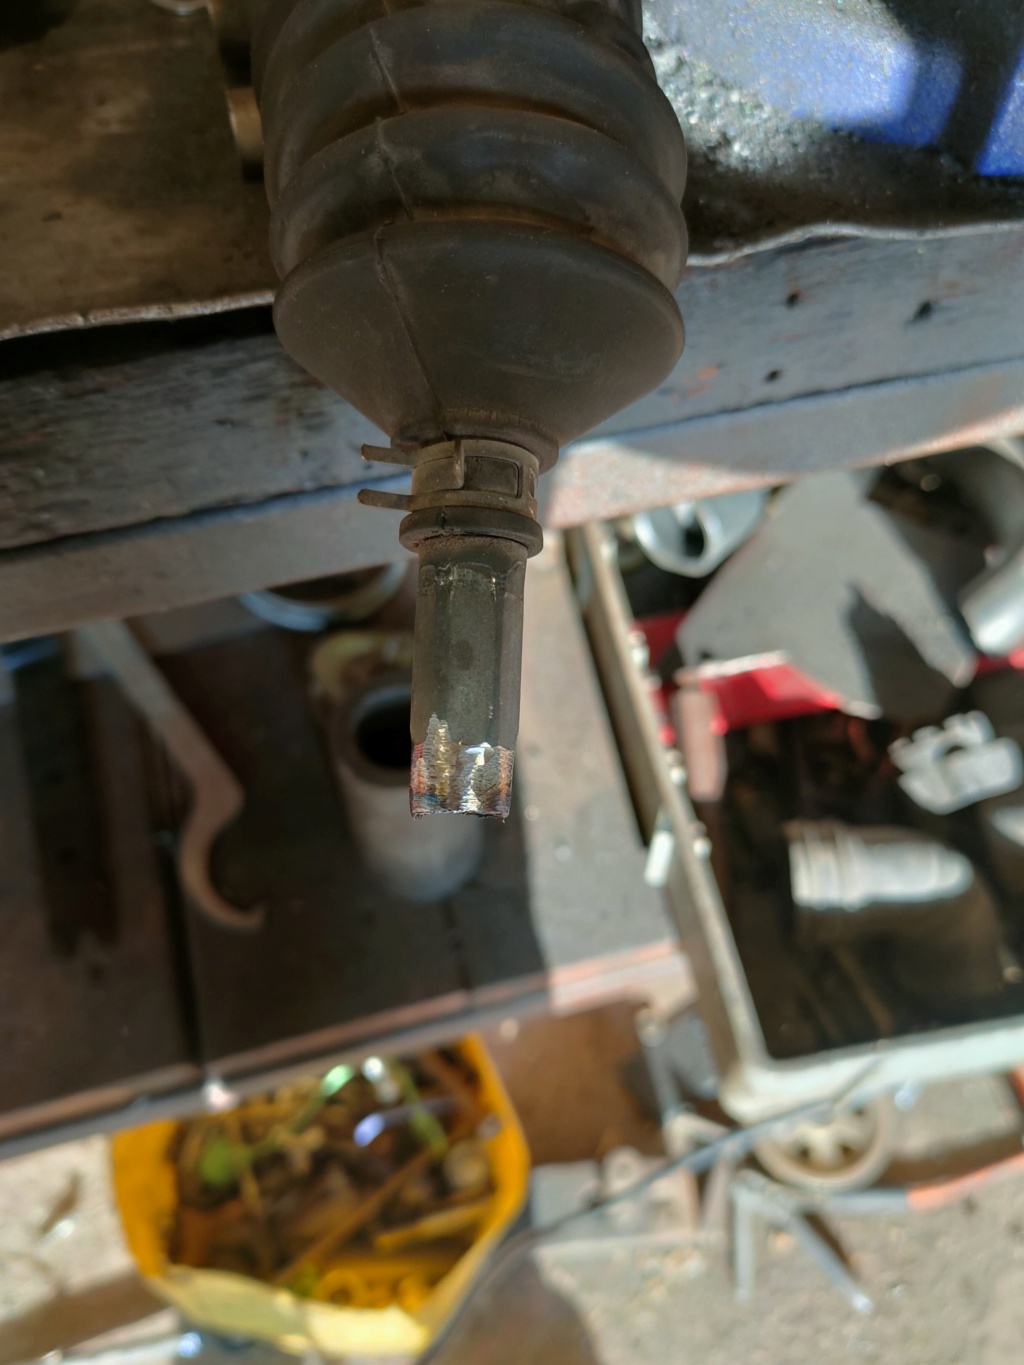
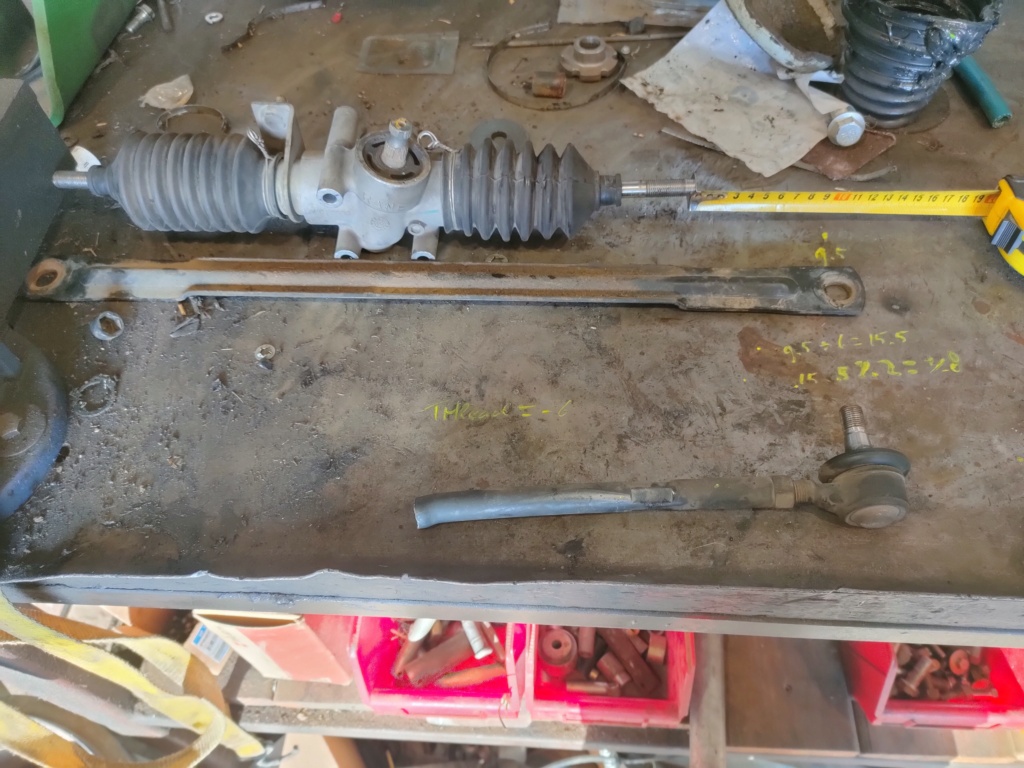
These ones have proven to be a pain to remove but I also got the other side off Some thread stripage but theres more than enough meat left (over 1 inch) Measuring to cut the arms
Brianator likes this post
fbisurveilancevan Member
Age : 37 Join date : 2022-05-20 Points : 972 Posts : 220
So I finished up most of that yesterday. Not being in the u.s. figuring out thread sizes can be a bit of a pain but I narrowed it down to 7/16 unf
Unfortunately finding balljoints in 7/16 is a pain or I simply can't get them shipped so iam forced to use studded heim joints so I ordered a couple of right hand thread ends.
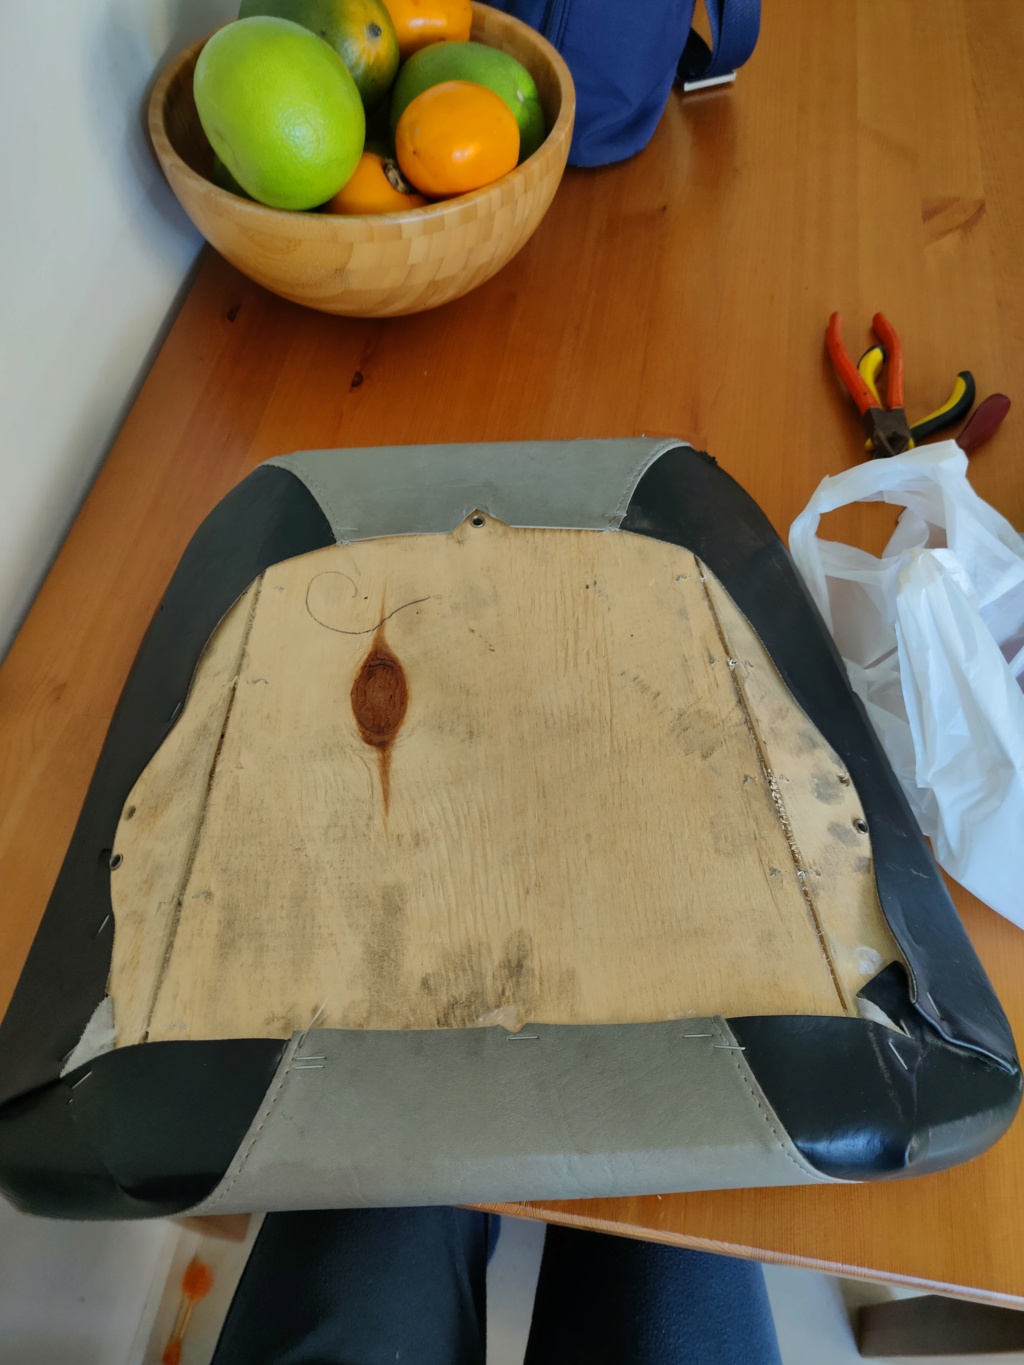
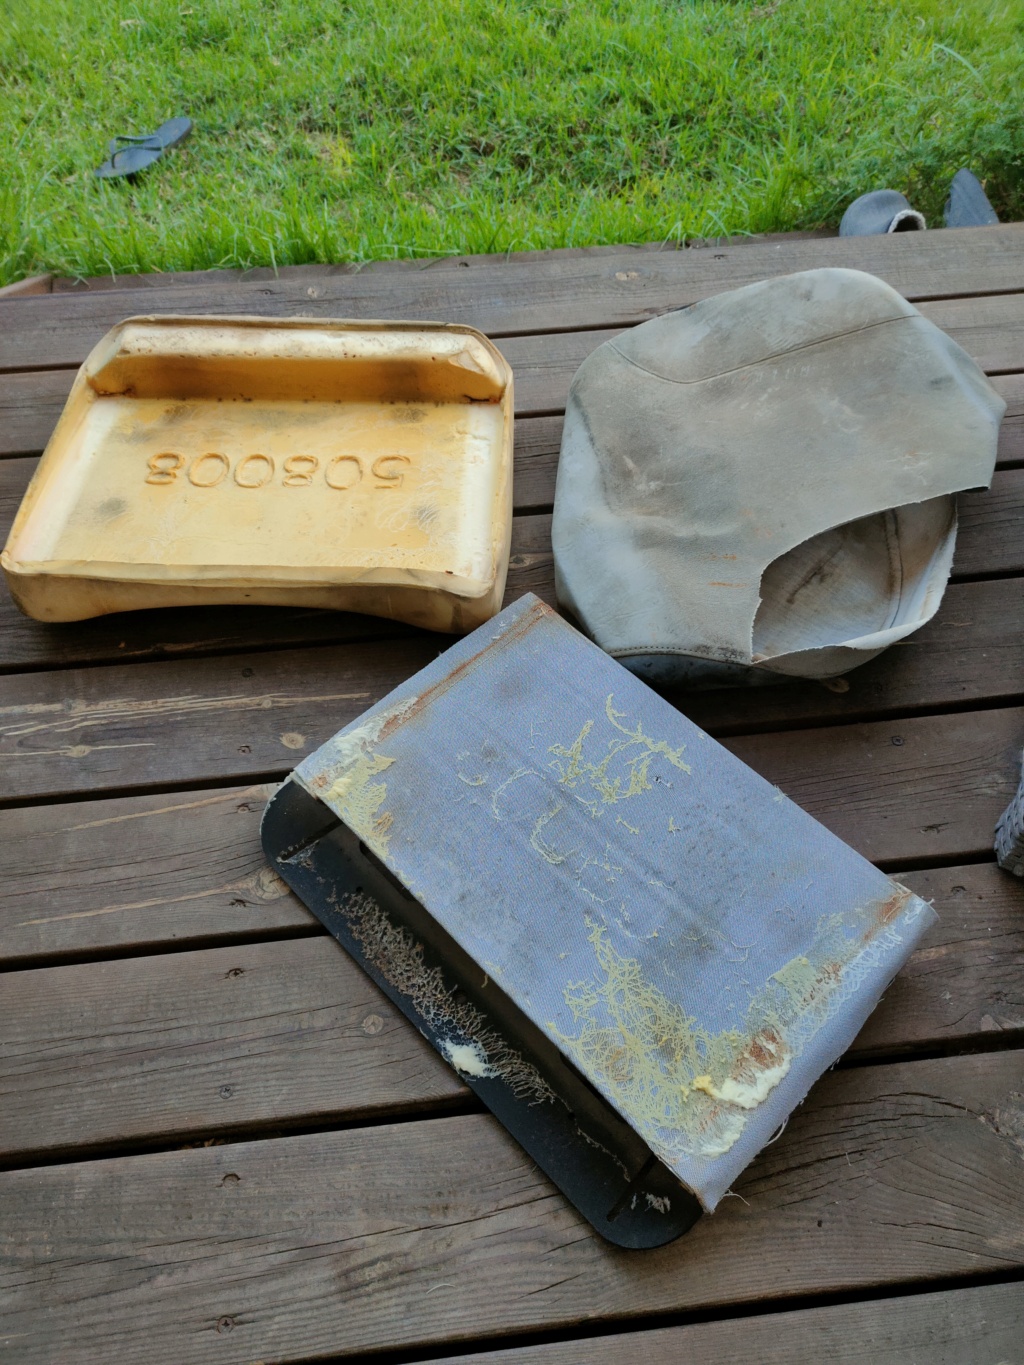
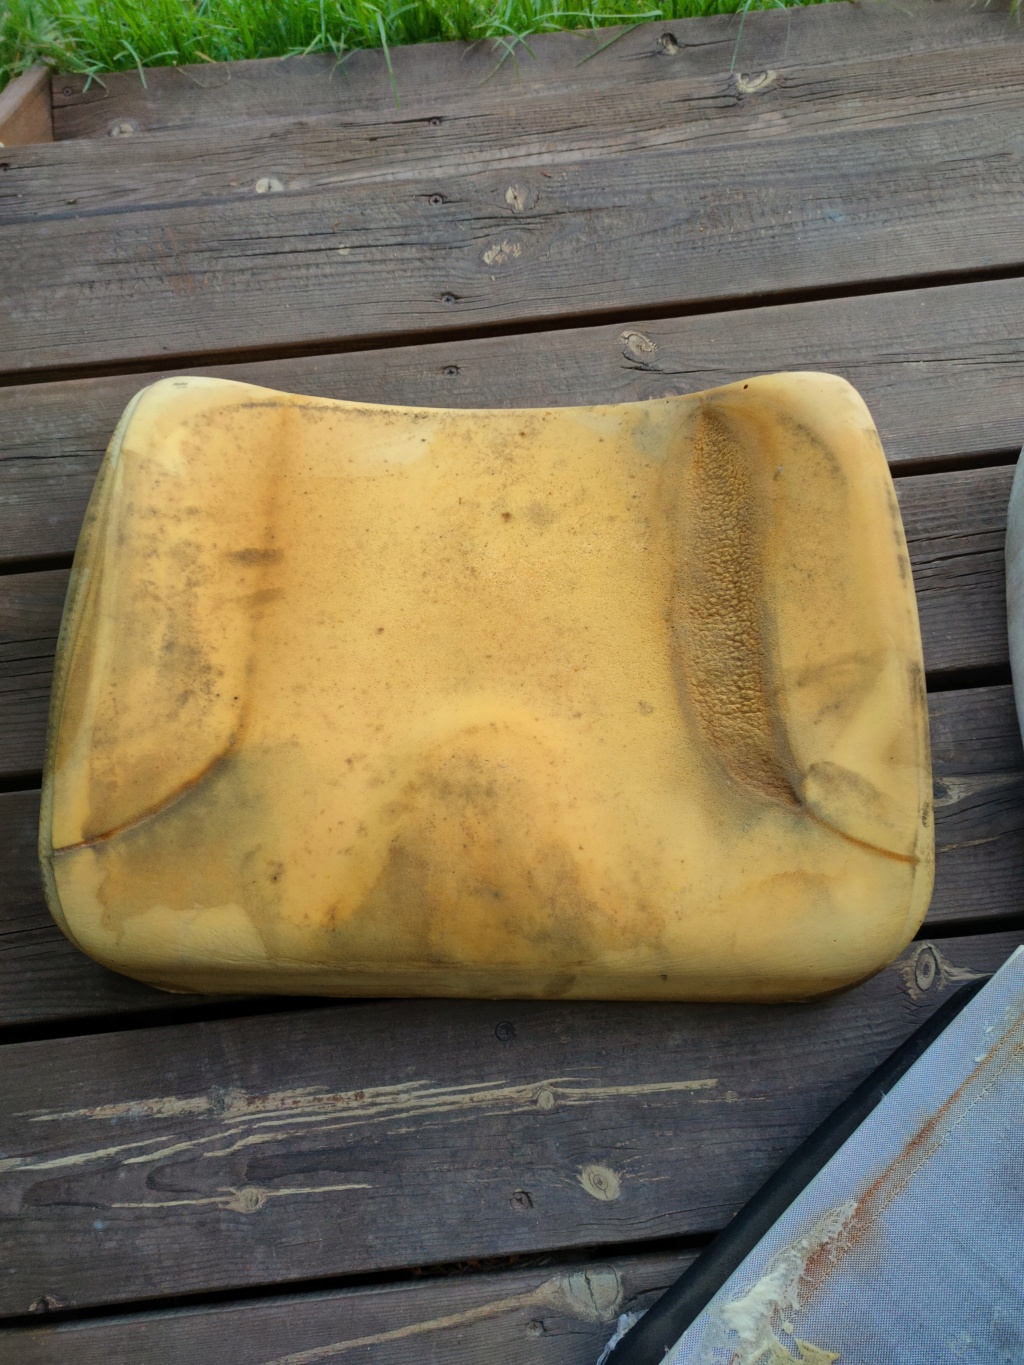
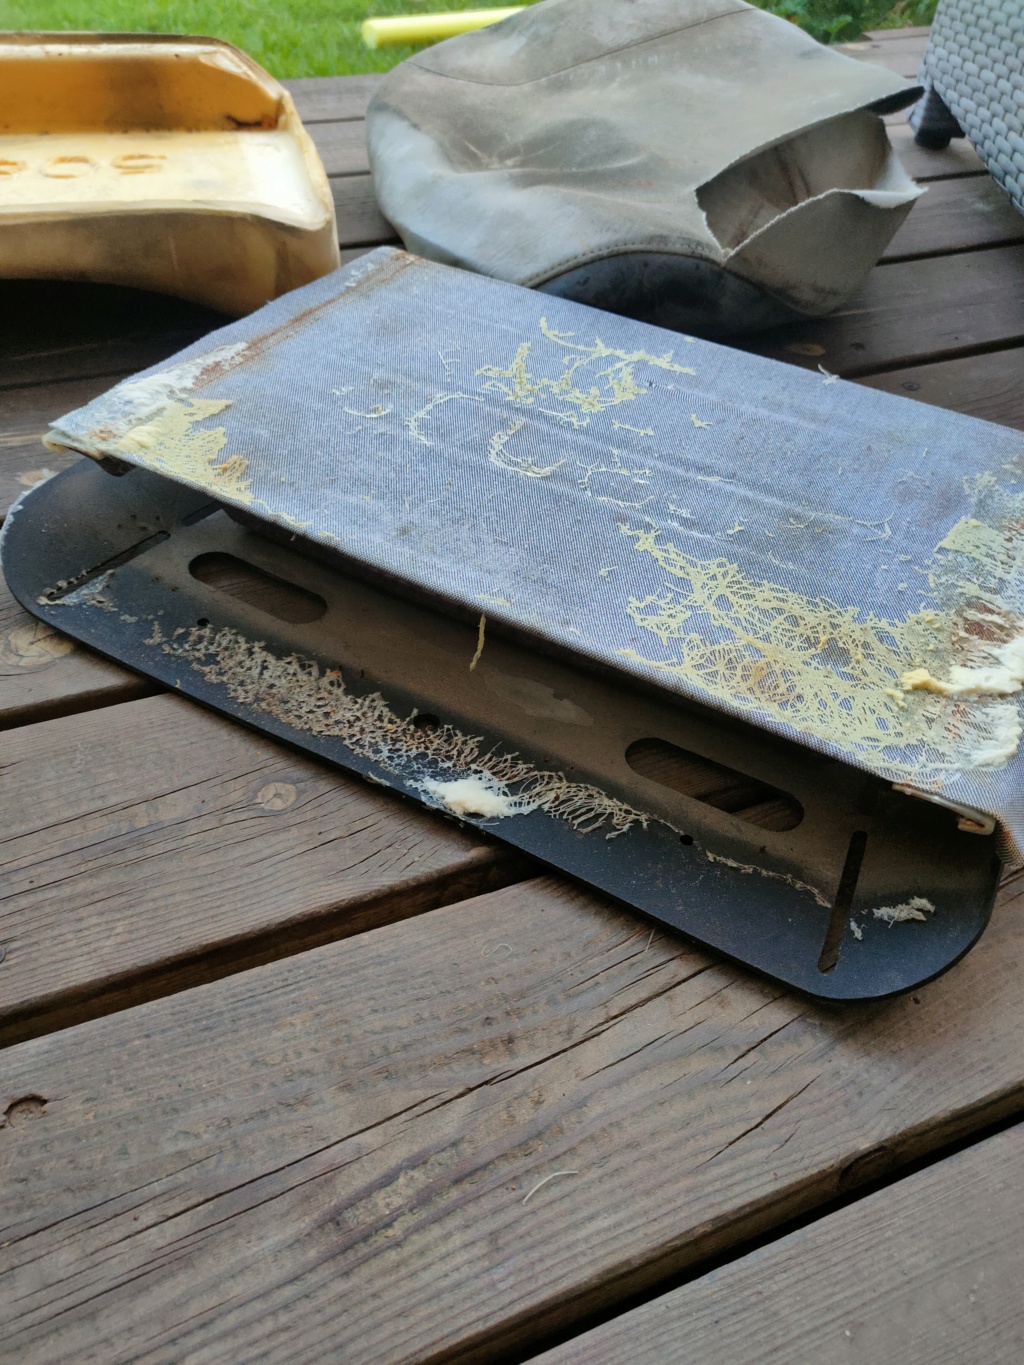
Meanwhile in the furniture department we are going Bananas This is a nos backrest for one of the older bigger ferris models with the caterpillar engine. I have a nos seat cushion to go with it and a used frame in the junkyard. These are essentially the rolls Royce seats among any mower I've driven But she looks a bit ratty and not the right colour So I stripped it down to the basics and will either have a new cover made in red and black or I'll ask the mil to give it a go I will add a thin layer of soft foam because even though it is new it has gone a little bit flat after 20 years in storage
fbisurveilancevan Member
Age : 37 Join date : 2022-05-20 Points : 972 Posts : 220
Old Vs new old Just about fits That needs a good clean, luckily only the inside is rusted but you won't see that. The outside I'll just do with some paint stripper. Think I'll just paint it red aswell
The backrest is already sent to an upholsterer, I did ask for some slight modifications to the backrest as iam a Skinny guy. Just wanted some more side support to keep me from sliding out
fbisurveilancevan Member
Age : 37 Join date : 2022-05-20 Points : 972 Posts : 220
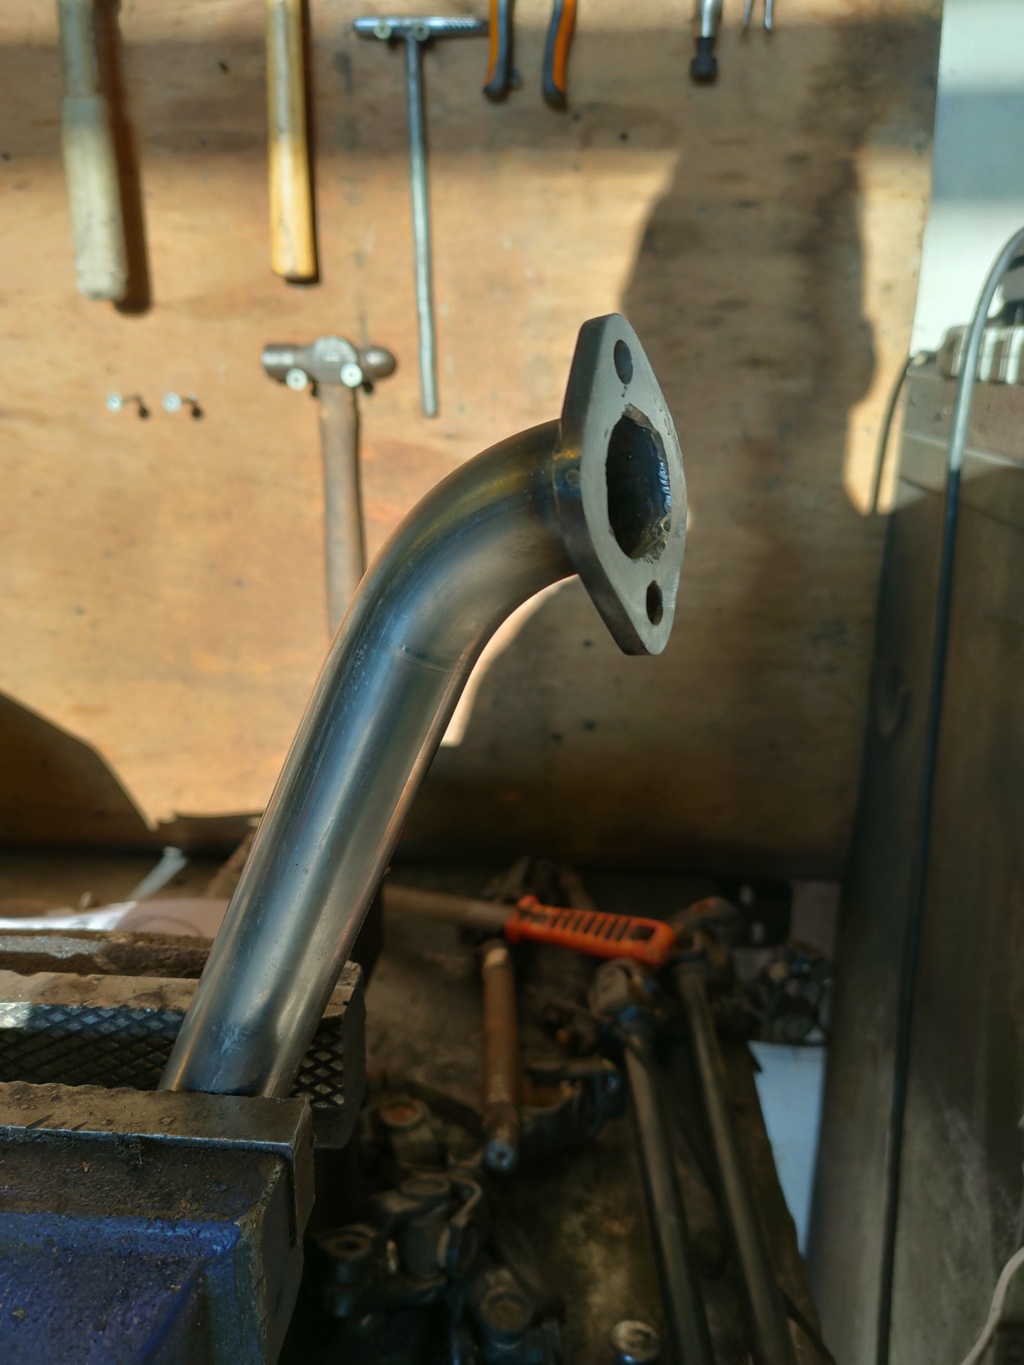
Intake is stitched up. exhaust is on the way as well, I just welded that one up with a minute to spare at work, just need to Grind the flange down some
That steering rack is really cool. How many turns is it lock to lock? Also i like your belt and clutch arrangement, its good inspiration for my own stuff.
Im looking forward to seeing your exhaust progress as well, thats another avenue im wanting to go as well. Yours is looking great so far.
fbisurveilancevan Member
Age : 37 Join date : 2022-05-20 Points : 972 Posts : 220
That steering rack is really cool. How many turns is it lock to lock? Also i like your belt and clutch arrangement, its good inspiration for my own stuff.
Im looking forward to seeing your exhaust progress as well, thats another avenue im wanting to go as well. Yours is looking great so far.
Well the header is done
fbisurveilancevan Member
Age : 37 Join date : 2022-05-20 Points : 972 Posts : 220
Yeah it really worked out the way i wanted without too much hassle. That bottom bolt will always be a pain in the ass I found that a Ferris brake plate bolt is a 5/16th bolt with a 5/16 12 point flanged head so that made things a little easier
Brianator likes this post
fbisurveilancevan Member
Age : 37 Join date : 2022-05-20 Points : 972 Posts : 220
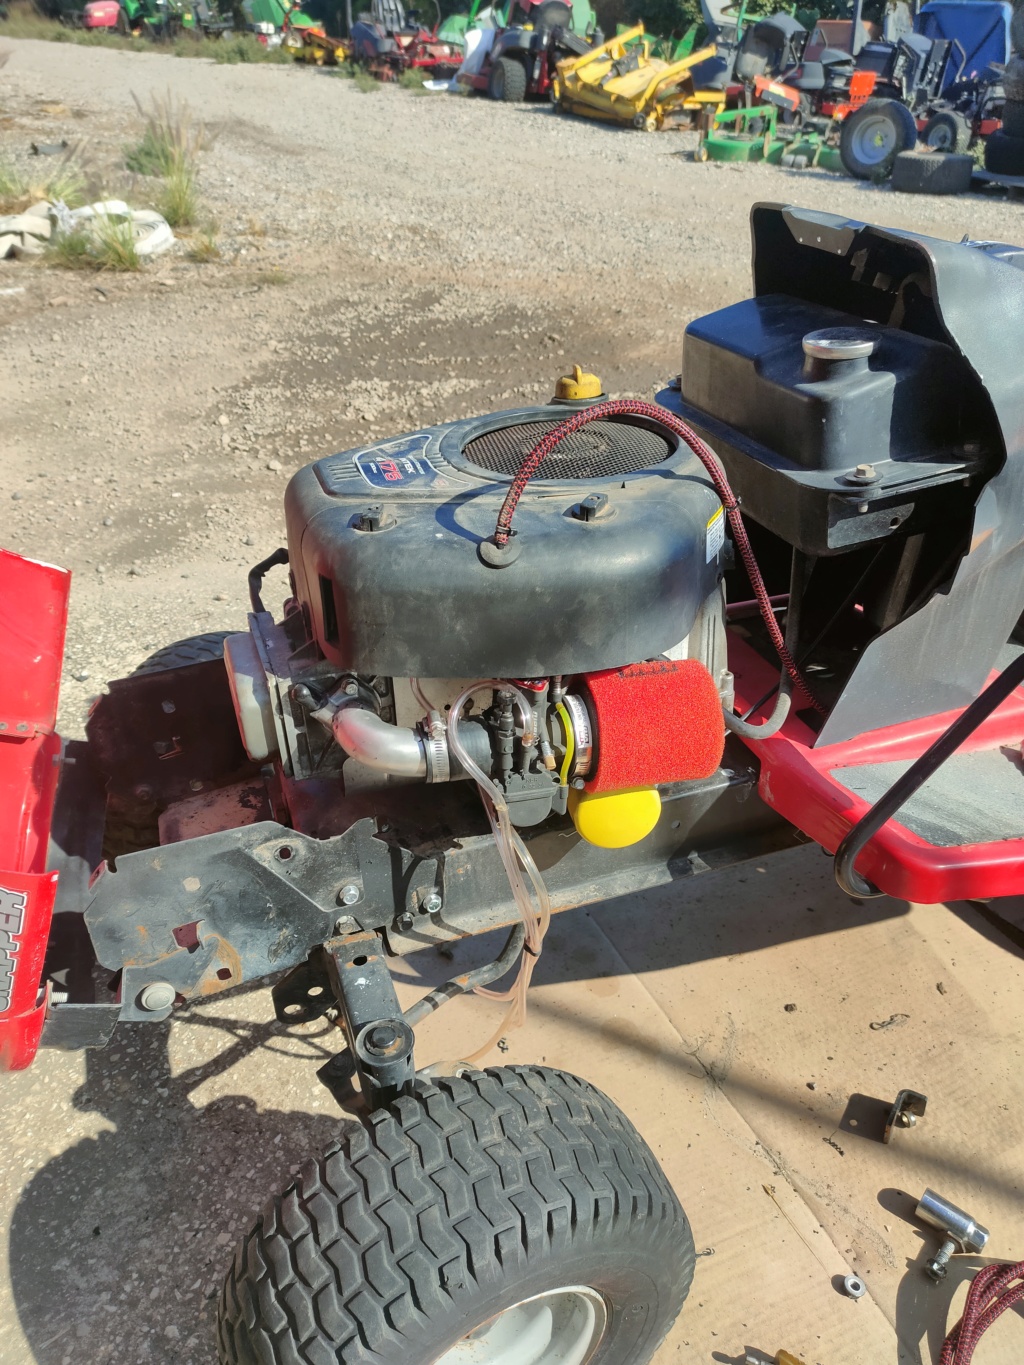
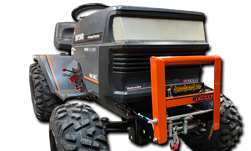
Cover back on for the last time, I might replace the cover at some point though It's obvious that the carb and filter aren't original but I tried my best to keep a somewhat stock look. And that lower exhaust bolt did take me about an hour to put in, it's as tight of a fit as it could be. Next up is wiring, I already started making a base harness for lights, charging circuit, starter and shut off. I am using colored wiring loosely based on John Deere wiring as that's my jam. Other than that I'll just reserve blacks for all minuses and reds for the bigger power wires Yellow will be aux wiring same as Deere. Also reusing some connectors, I have new ones but these match closer to the originals Fuse box, everything will be independent, these have a single fuse only from the factory but I just wanted to get it organized. I did go with the original style as found on many equipment.
Other than that I did remove the old exhaust and will be putting the battery there, that also frees up space for the seat
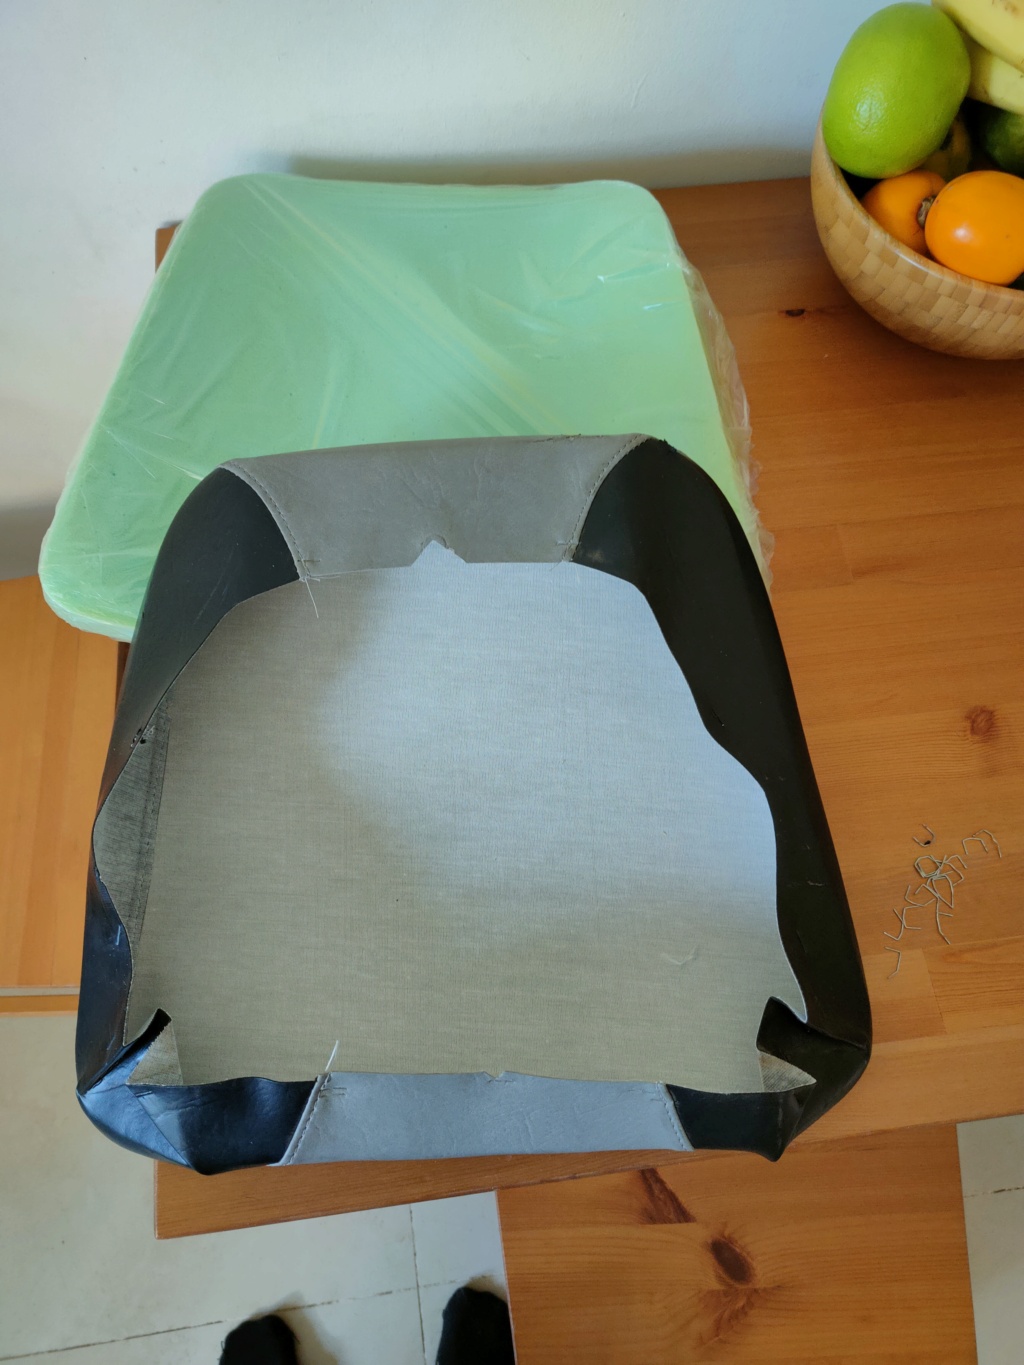
Speaking of seat, almost forgot. The stitching looks a bit wonky in the picture for some reason but that's not even noticeable on person.
Brianator likes this post
fbisurveilancevan Member
Age : 37 Join date : 2022-05-20 Points : 972 Posts : 220
More seat mania. Seat foam is a little rough but I'll get that right Biggest change will be in the base as I will want to lower the cushion another inch Ill remove the cloth and brackets and mate the foam directly to the backing. Backside will be filled in with foam and shaped to the pan just need to remove an inch from the front. I have a foam cutter on hand so that shouldn't be too bad.
It all sounds a bit Miami and a lot of work to lower the seat another inch but in the end it will all go towards stability.
fbisurveilancevan Member
Age : 37 Join date : 2022-05-20 Points : 972 Posts : 220
It's been a cold (55/65f) and wet week here and I am going on vacation for 2 weeks in a few days. Haven't been doing much actually.
Operation steering rack is on hold untill I get some parts in the mail.
I am still wondering if I want to start with the front suspension or just get it driving for now. Problem here is that if I start with the suspension I will be opening up a can of worms because I most likely need to stretch the frame a little. This would also mean that I need to work on the hood hinges and the spindles. I might be better off making a template out of the old brackets and remaking them out of 3/8 steel and incorporating the a arms while it's off the tractor.
That's the setup iam going for since I have all these parts used or new. I will likely shave down the width of it on both ends and will use the same spring with modifications. These springs are soft on the Ferris but will be a lot harder for a light machine. If not I will look for some shock absorbers but would like something quite thin so if someone has an idea that'll be welcome.
For the seat ill be looking for some foam today so I can start on that.
I guess I lost a bit of drive and just want to get it finished but ordering parts and finding time is always slowing me down.
Also have been in a legal matter for the past 2 years and while I won that ordeal I have been dealing with the aftermath. Actually was wrongfully arrested 2 weeks ago and even though I was released the same day it's just a downer
MightyRaze Administrator
2017 Build-Off Finalist
2017 Build-Off Finalist
2018 Build-Off Top 3 Winner
2018 Build-Off Top 3 Winner
2019 Build-Off Top 3 Winner
2019 Build-Off Top 3 Winner
2021 Winner of Winners
2021 Winner of Winners
1st Place Build-Off 2022
1st Place Build-Off Winner 2022
10,000 POSTS!
10,000 POSTS!
2024 Build-Off Entrant
2024 Build-Off Entrant
Age : 49 Join date : 2016-09-06 Points : 15112 Posts : 10665 Location : Oklahoma
I'd put the project aside. Get ready for you vacation and enjoy it. I'd just drive it for now and get some enjoyment out of it. If you are set for doing suspension, collect your parts and do it later when the drive comes back. It's what I do.